To create a wedding welcome TV screen, choose a short welcome, confirm the couple’s names and event date, build a design that fits the TV, and test it at the entrance before guests arrive. A photo, a simple text design, or an AI-created screen can all work. The priority is that arriving guests can immediately recognize the celebration.
For a venue, the screen is also part of the service you deliver. A polished welcome includes the right file, the right display, a checked playlist, and someone responsible for changing it after the event.
Confirm the wording with the couple or planner
Ask for the exact display names, including spelling, accents, capitalization, and the order of the names. Use the wording the couple chooses rather than inferring surnames or forms of address from a booking record.
Confirm whether the screen should show the ceremony date, the reception date, or a simpler welcome without a date. That small decision matters when a celebration spans midnight or takes place across several days.
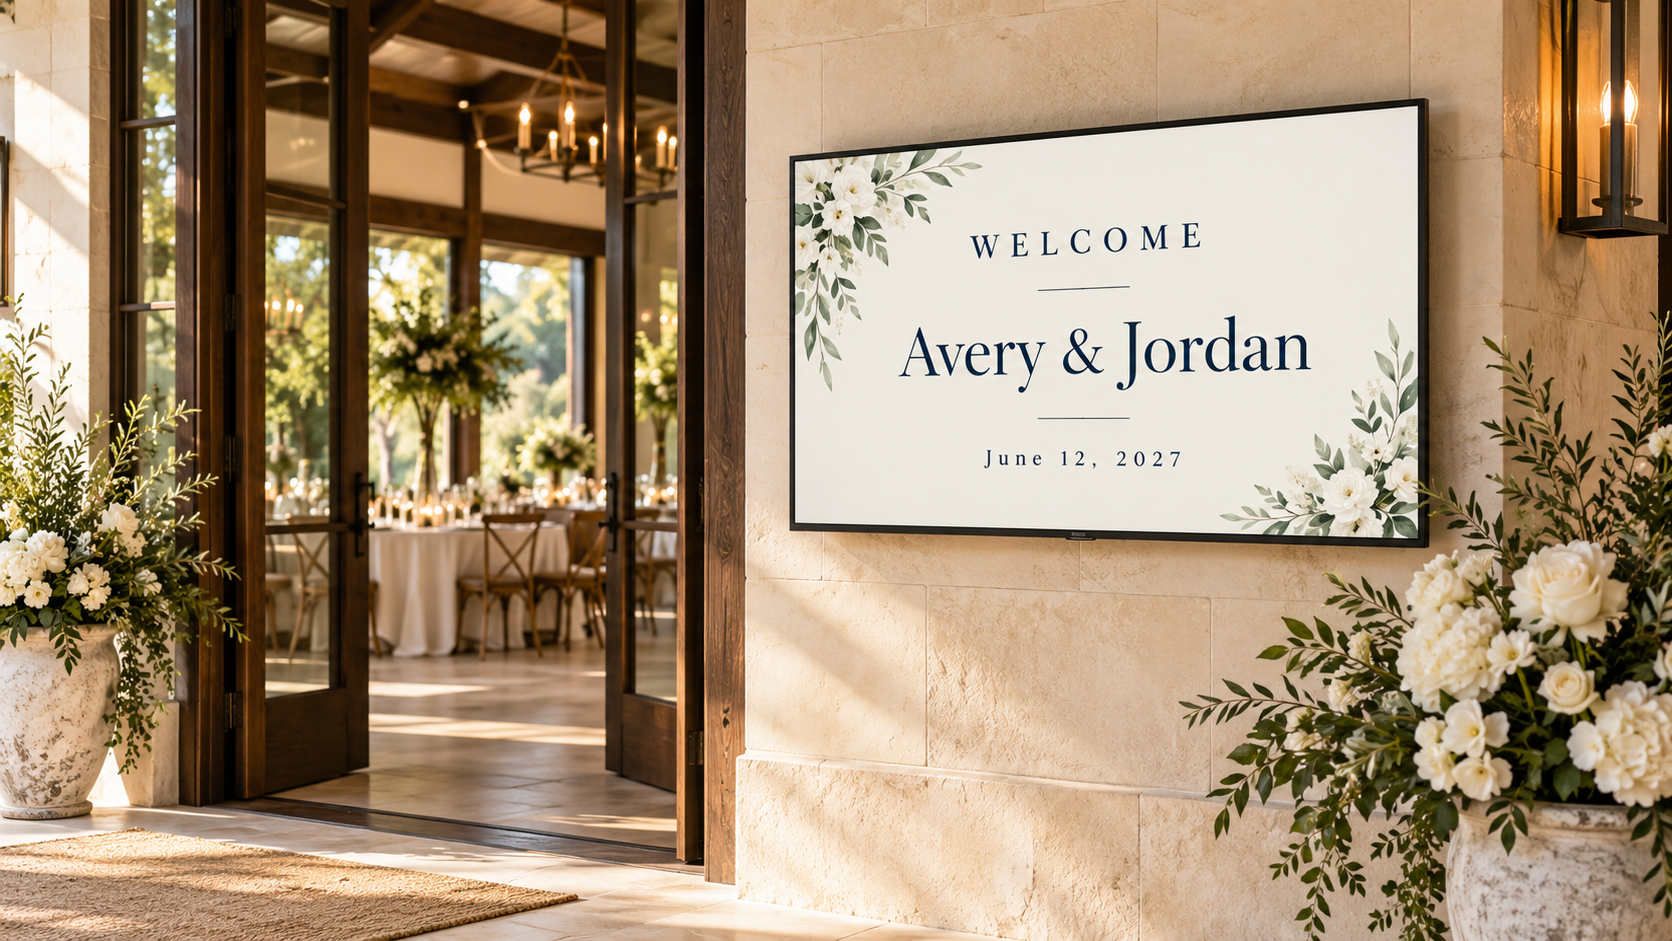
Here is a fictional example:
Welcome
Avery & Jordan
June 12, 2027
That is enough for a recognizable entrance screen. If the venue hosts simultaneous events, add a short room name or direction only when it helps guests reach the correct celebration.
Choose what belongs on this particular screen
An entrance welcome should usually give priority to the names and greeting. Keep the schedule, seating assignments, bar menu, sponsor messages, and venue promotions out of this design unless one of them is necessary for arrival.
If guests need a direction, make it a separate clear line: “Reception in the Garden Room.” If they need a detailed seating chart, give that task its own display or another accessible source of information. A small screen filled with names can make an elegant entrance difficult to use.
Decide whether the welcome should remain the main message throughout arrival. If you rotate it with other content, watch the actual sequence and consider what a guest sees during a brief walk past the entrance.
Create the design from the material you have
You can start with an approved engagement photo, a monogram, wedding colors, or just the exact welcome wording. Keep a copy of the original assets supplied by the couple or planner so you can compare the result with the intended material.
In Pair and Play’s built-in Screen Maker, photo, description, logo, and exact wording are optional inputs. You can use one or combine them. For a text-led welcome, the names and date can be the starting point; a photo is not a requirement.
A short description could be: “Create an elegant wedding welcome screen for a landscape TV at the venue entrance. Use ivory and dark navy with restrained floral detail.” Add the approved names and date in the exact-wording field when you want those details included.
Choose visual detail that supports the names. A floral border or a photograph should leave room for readable text. Thin script, busy patterns behind lettering, and several competing type styles are worth simplifying when the design is hard to read on the actual TV.
Match the screen and the room
Check the TV’s orientation and how it will display the image. A landscape welcome made for a horizontal TV should preserve its proportions when uploaded. Avoid stretching a portrait invitation across the screen.
Stand where guests first see the display. Check the names from that position, then from the farthest normal approach. Look for glare from windows or venue lighting, and make sure flowers or other decorations do not hide part of the screen.
For hardware and connection options, use the current Pair and Play setup guide. If you are starting with an existing venue TV, this guide explains turning it into a customer communication screen.
Approve the design and its playlist
Send the actual finished design to the person responsible for approval. Ask them to check the spelling, date, room name, and photo crop. An approval of an earlier draft should not be assumed to cover a later version with different details.
Give the event playlist a recognizable name, such as “June 12 — Avery and Jordan — Entrance.” This is sample naming, not a required format. The point is that the person operating the TV can distinguish this event from another booking.
In the current Screen Maker interface, read the destination shown beside the approval step before choosing Approve and add to playlist. Then confirm that the intended playlist is assigned to the entrance TV and the relevant event time.
Use a short event-day handoff
Assign one staff member to check the screen before arrival and one backup who can help if the first person is busy. Give them a small handoff record:
- Approved design: identify the final version so an old draft is not selected.
- Display: name the entrance TV or other specific screen.
- Timing: record when the welcome should begin and when it should be replaced.
- Playlist: name the event rotation and any approved companion messages.
- Next event or default: identify what should play after this celebration.
Before doors open, inspect the physical TV. Check the full image, audio behavior if other media is present, power, connection, and the complete rotation. A correct file in a media library does not replace this room check.
Reset the display after the celebration
After the event, return the entrance display to the venue’s default content or the next approved event playlist. Keep the final artwork and approval record according to your normal event process, and remove the design from active playback when its job is complete.
This final step protects the next arrival experience. Guests should see a welcome that belongs to the celebration they are attending.
Start My 14-Day Screen Test to try one venue welcome in Pair and Play. Begin with a real event message, get it approved, and see how the finished screen looks at your entrance.